I went back and forth whether or not we should pull the Christmas decorations out before Thanksgiving–and I decided to slowly but surely get a few things out…and while we were at it…why not go ahead and make the banner tutorial some of you have requested:). SO…I decided to make a banner that we can use each year at Christmas! These would make sweet little gifts or use them like we did for special occasions (the boys’ dedications and later hang them as keepsakes in their rooms). What a wonderful thing to do before decorating–I sat down and read through Luke 2 to choose a verse for our mantel. This is the one I chose to hang on our fire place this holiday season….jpg)
While the letters are a bit crooked and I bought a stamp set that didn’t have punctuation–you can get creative and make due–and I think the less perfect it is…the more fun and rustic it looks (that’s what I like to think anyway!) SO…for those of you who made the request and others who might like to get crafty over Thanksgiving as you think about decorating for Christmas—here you go…
1.

2.


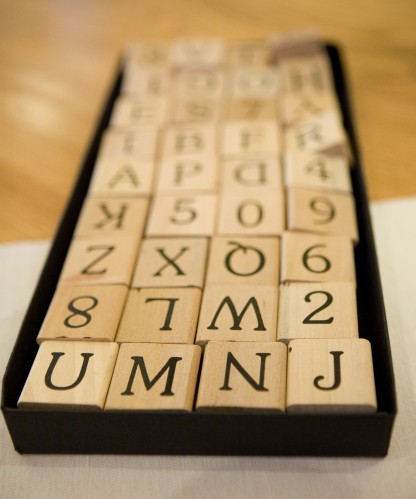
I printed the verse off I would use so it was in front of me to refer to. Then I just started stamping away. I bought my alphabet stamps at Hobby Lobby and they are at least 1 inch by 1 inch. You could use any color ink, but I just chose to use black to keep it simply. The first time I made a banner, I tried to keep the letters really straight by using a straight edge. It actually looked worse b/c it was more noticable if I made a small mistake after having several letters aligned perfectly–so I tossed the straight edge after that one and the rest of the banners I have made I simply eyeball it and put the letters as close as I can without overlapping. I even purposely turn them at a slight angle some times just to add a little more character.
3.


4.

5.

6.


7.


Fold the twine in half and lay the rope at the corner top edge of the white banner. Sew back and forth several times to secure the twine to the banner. Do this on both ends. Then, just for appearance and a completed look–go back and tie knots in each end. And your done!!! It’s ready to hang!!!

I think we’ll actually move the nativity to another table–but I thought it was fun under the verse until I make the wreath that will go under it–between the toparies. Also–I tried a decorative stamp I already had on each ends just for a different look. I like it both ways…here is what a banner looks like without them and just hanging above a doorway (the way we hung them for the babies’ dedications)…

I have ONE more burlap craft…okay maybe TWO…so there if you buy some burlap I will help you use it!!!
LAST BUT NOT LEAST…I have an AWESOME give away to tell you about that ends TOMORROW!!!! You HAVE to check it out. ONE…because it’s an AWESOME give away!!!

Here’s the run down on how to enter and how you can ultimately help them bring their baby home…Donate $10 toward to help Lara and her family bring their baby home–and your name is entered 1 time!
Buy one of their t-shirts (proceeds for this ALSO go toward their adoption!!!!)—and your name is entered 3 times for every t-shirt you buy!
If you buy one of her t-shirts or donate toward their adoption…tell Lara I sent you!!! I’m off to buy one of her t-shirts now!!! Seriously…the long-sleeved ones would be so great for just a kickin’ it day running errands–and I LOOOVE what it says “Each of us matters to God” shaped like Africa. Such a beautiful reminder how each of us DOES matter!!! I remember my first trip to Africa I was overwhelmed—why do I get to live here…why them there…BUT to know that EACH matters to Him and He is caring for them in unseen ways–and He may even choose to use me to help care.
OH…I want to win this give away!!! Oh…did I hear someone say they don’t like t-shirts??? WELLLLL…if you win…you can send them to ME;-) because I’d LOOOOVE to win this give away!!!!!
Hope you all have a great week ahead!!!!
XOXO,
Andrea


by admin
Fun craft! When you posted the fall wreath I called my mom and asked if she had any burlap. She didn’t…so I went and bought my own. Little did I know she went and bought me some that day just to make me smile. So AFTER making the fall wreath, I still have two more yards! This will help me use some of that up! Thanks for the fun idea. Plus WHERE did you get your nativity?? The only one I have yet is the clay one I made in high school…I seriously need to invest!
OH … if I could only find a Hobby Lobby in Hong Kong! I LOVE THE BANNER! Heading over now to check out the t-shirts!
Love & Blessings from Hong Kong,
Kim
I LOVE the banner. I was all excited to make one until you mentioned sewing. I don’t sew! Any other way to get it together? 🙂
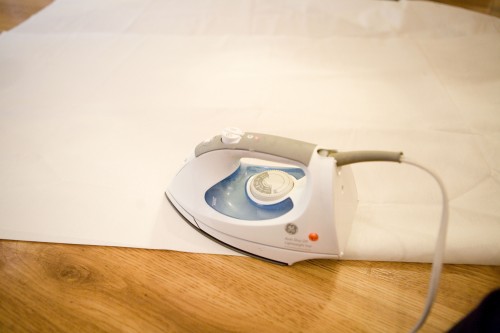
Of course you can do this without sewing!!! Buy Heat-n-Bond instead. You’ll iron it on the white fabric, pull the backing off and simply iron it on the burlap! That’s it!!! (You can buy heat-n-bond online, at Walmart or Hobby Lobby.)
P.S. To do the roping w/out a machine, you will want some needle and thread to stitch the twine on the ends at least–OR you can try hot glue…hot glue works for just about anything and it should hold this just fine too!
thanks so much for the tutorial…love it and hope to try it sometime!
Love these. So cute yet simple.
I was hoping you’d post a tutorial for the banner! 🙂