SOO…if you have been reading my blog for a year now–then you will remember the VALENTINE BLESSING COOKIES! Now, I see no need to try and reinvent the wheel when we got so much sweetness out of it last year!!! SO, I’m reposting the instructions for what we do for Valentine’s! I’m posting this NOW–because if you want to do this you need to complete this project THIS week as you start it on February 1st and give each of your littles ONE cookie EACH day leading up to Valentines! SO…here’s what we do…and the post from last year:
I LOVE holidays. Love them. Of course if you’ve been around…you know Christmas is my favorite. And although many bark that most other holidays are commercialized and just to make a buck–I like to use them to love on my kids and create traditions with our family. I’m SO EXCITED about Valentine’s day that I’ve already got my materials for every February craft…and because we’ll start this one on the 1st of February—I just *HAD* to share today for those of you who just MIGHT want to do it too! Here’s my inspiration for the month of February for ya…
.jpg)
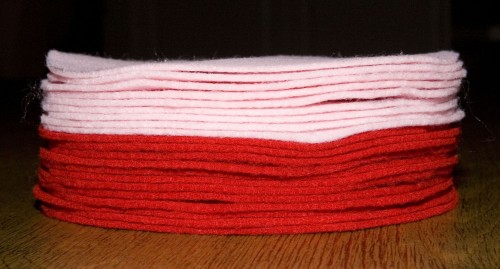
This is a set of 28 fortune cookies. 14 (red) for Parker. 14 (pink) for Laney. The “cookies” are made our of felt, wire and glue. And guess what is inside each one? There are 7 Bible verses proclaiming the Lord’s truth and LOVE to Parker and Laney AND THEN there are 7 statements of love and affirmation from me (& Rich too of course;). Beginning on February 1st, each day each child will get to choose one from our cookie jar to start off their day leading up to Valentine’s!
I’m so excited to do this with them each day…and for someone who used to ROLL their eyes at Valentine’s Day…I’m really excited about this activity and the other crafts ahead. This is the only “make ahead” craft if you, too, want to start this on February 1st–so I decided to share it early so you have plenty of time to get rolling! Here’s the steps to make it:
1. You will need approximately 5 pieces of 8×11 felt per child (each piece will make 3 4-inch circles and I also chose to do all of my son’s in red and my daugther’s in pink just to make sure the boy doesn’t get some of the more cheesy love notes from me), florist wire, hotglue (regular glue works too–but not as good) and printed “fortunes”. Also–use the SOFT felt. I tried everything from the thicker felt to foam–and the softer felt folds into cookies best.
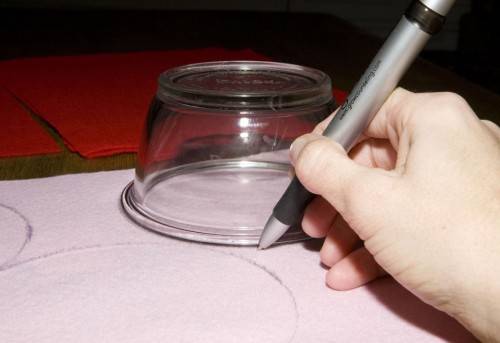
2. Draw 4-inch circles on felt and cut out.

3. Cut florist wire the diameter/length of your circle. Apply hot glue in a straight line down the center and carefully press wire in hot glue… (You can also use pipe cleaners and Elmer’s glue if you don’t have florist wire or hot glue BUT florist wire and hot glue work BEST)
4. Cut 4 x 1/2 inch strips of felt to hot glue OVER the wire…(this keeps the wire from showing when you fold your cookies as you will be able to slightly see the center)
5. Create your “fortunes” or use mine.

6. Fold the circle in half (wire in center) and carefully bend the wire sideways to create a fortune cookie! If you have older children then you can probably get away with displaying them on your coffee table in a really fun way… (AND you can use this year after year! How fun would this also be to do when you travel and you have to be away from your kiddos for them to get “love notes” from you each day while you are away!)
Unfortunately…that display would last 10 minutes in my house! So…until they are bigger—we’ll display our cookies appropriately in a cookie jar!
FUN, fun, fun! Aren’t those ADORABLE!? Please let me know if you end up making these and how your children enjoy them! Also–I have some precious crafts I’ll share in February–so if you want to do those too…while you are picking up your felt buy these items also: wax paper, crayons, different shades of pink and red thin silk ribbons, red paint pen, white paint pen, plain plastic brown bandaids and construction paper (pink and red).
OK…not gonna make ya wait! Gonna go ahead and post the OTHER fun Valentine’s thing I did last year too!!! THESE are what my kids sent out last year??? HOW FUN IT THIS…(note: this is from last year…so my heart melts to see how much they have changed…and THIS YEAR Isaac will of course need to be included:)
SOOOO these are called “Get Well Valentines!” because you know kids LOOOVE some bandaids…and they seem to always have boo-boos! We played nurse and doctor dress up (found a nurse hat tutorial online!), and today I “tagged” them! They are ALL ready for tomorrow’s Valentine’s! I even made Frankie-baby one to give his 2 Valentine girls–Kylie and Georgia…yes, he is a lady’s man;). These were so much fun to make! The back of these say “Packaged for my Valentine” with the contents (chapstick, love bandages, organic cough drops, etc)
How fun is Laney-loo in her nurse’s hat…
Parker-man and I made a doc hat…
And we couldn’t resist asking Frank to participate too (after all…his Valentine’s would be sad not to get a Valentine from the man in their sweet little lives!)
And if putting together a little doc/nurse survival Valentine is just too much for you…you can always play dress up and put together a quick little one like this…
How fun are the bandaids?!…


These would make fun little treats for you to give your little ones—but if you decide to do this craft together and you have little ones like me, I recommend buying some fun Valentine stickers that they can use to decorate some bandaids… [Our stickers would some times go over the bandaid edge—just take a pair of scissors and carefully trim the sides trimming the extra sticker off.]

And look who went to preschool this morning in their new Valentine scarf (yesterday’s craft)… It was the FIRST thing she asked about this morning and she even picked out a Poppy Dip to match! (By the way…if you don’t know about Poppy Dips…check out the blog…the proceeds go toward their next adoption!)
And DON’T FORGET…just after Valentine’s…is LENT! I can’t WAIT! If you missed my post on a unique and powerful way to celebrate Lent and the resurrection with your family, click here!
Between now and Lent you can start your stick collecting and follow our Lent plan (up there). It’s so sweet…and so POWERFUL!!!!!!! This is what our Lent Tree always looks like…just so you know what to prepare for if you want to join us (a vase, twigs and white paint is all you need!)

And of course you’ll want to start collecting your ornaments now so you have them all ready for Lent come mid-February. THIS IS ONE OF THE MOST MEANINGFUL THINGS WE DO WITH OUR CHILDREN. PERIOD!!! AND THEY LOOOOOVE IT! Every ornament prepares them for EASTER…Jesus’s crucifiction, burial and RESURRECTION!!! Each ornament represents a Bible story that foreshadows and connects to Christ…and His purpose in our lives!!!
Ok…so there ya have some crafts and such to keep ya busy!!! AND to engage your kiddos! Hope you all have a great week!
XOXO!
Andrea


by admin
How fun! I’ve gotta give that a try!
your so crafty andrea…inspires me! ;0) I want to do these things when Isaac gets older and when hopefully we have more children running around, Lord willing! ;0)
I’ve got our fortune cookies ready and waiting! Looking forward to pulling them out again this year. 🙂
You’re the coolest mom, EVER!! Can I be your kid? 😉
You know I’m working on them – almost done! 🙂 As for the Lent tree, thanks for getting back to me but I’m still a bit overwhelmed where to begin to look in a store as big as Walmart without spending 4 hours there! 🙂 ha! And as much as I would LOVE to do this with my kids, I don’t know where the 4 hours to find everything would come from! 🙂 Maybe you can give us some clues in a future blog post? 😉 😉
Can we move in next door when we repatriate?!
“Cause you make me feel better”!
Love & Blessings from Hong Kong,
Kim
iwe do a jesse tree at christmas, same idea as this lent tree, LOVE IT. i am now opening all my christmas boxes to dig out ones that will match up. i would love to see yours for some ideas on the ones i dont have. so would you please post pictures (with all your extra time) or you ornaments. thanks
Thanks for re-posting this. I sent a set to my husband in Afghanistan last year, thankfully he is home this Valentine’s! I also just saved the ones for my kids so I could use them as long a possible. Thanks for reminding me to dig them out, quickly!
Hey friend! I made them!!! And I love them!!!!! Check it out if you want to…
http://montgomeryjourney.blogspot.com/2011/02/valentines-fun.html
Hi Andrea! Love the “fortune cookie” craft idea. It is very safe to say that mine were just a little “off.” 🙂 I blogged about it if you are up for a laugh. 🙂