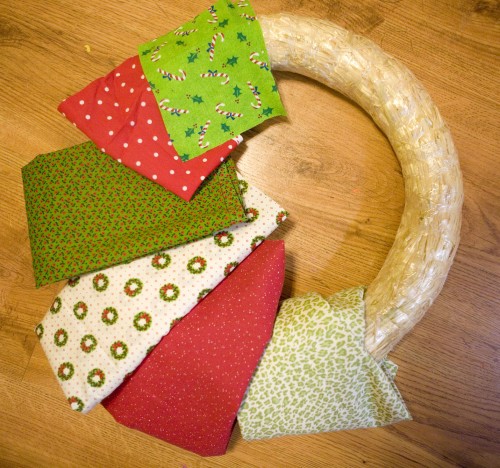
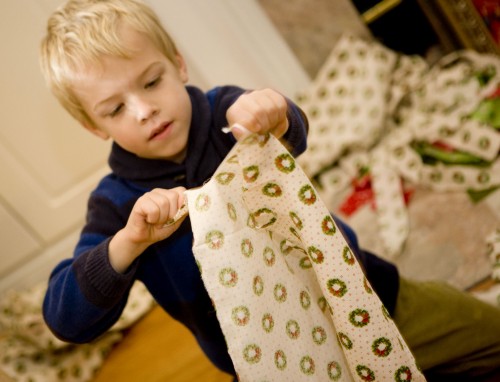
This is a simple and fun project–so easy that even the kids can make it! For my wreath, I used scrap fabric–so the ONLY cost was the straw $2 wreath (50% off at Hobby Lobby). I did add a bird to the center which is the ONLY part that requires sewing which is optional! This wreath takes just about a hour to complete–we (Parker, Laney and I) did this for our Sunday craft while the babies and daddy got in their Sunday afternoon naps…
.jpg)
Side note: This momma loves to add anything to decorations that have added stories or meaning. For this wreath–it’s the sparrow. Luke 12:6 says “…not one sparrow is forgotten by God…” and if not one sparrow is forgotten by God…then we can be SURE that not one person…not one child…not one orphan is forgotten by God either. So…that is the meaning behind my bird–to remind us of our Creator’s priorities and to trust that He is going to care for us and for all of the children of the world.
You can also make this WITHOUT a wreath by simply using thick wire–say a clothes hanger might work–and it’ll just be tighter and you’ll want shorter strips of fabric.
1. Choose 4-5 different fabrics for this project. (You can really make this trendy with FUN fabrics. This momma won’t buy things if she has something here that will work—so I used old fabrics my grandmother sent me years ago that I needed to clear out of my fabric cabinets). You will need 1/2 yard of each fabric.

2. Cut as many strips as you can from each fabric–18″ x 2″. To involve the children, cut 1″ tabs at the edge of each fabric 2″ apart. Let the children rip them down the edge—this will only work with cotton thinner fabrics—and this is my trick to keeping things straight when I sew anything. It’s OKAY!! Let them rip away…your boys will especially love this part!


3. Let the kids go through the strips pulling off (or trimming if they are old enough to use scissors) any hanging strings from fabric strips. (My boy loved the ripping while my girl loved the snipping! AH…that rhymed;)

4. Double knot the fabric strips all the way around the wreath keeping the knots tight and the fabrics close together. (Tip: To make sure different fabrics are evenly spread out, tie the fabrics one at a time by color/type…this way your different colors are spread out). SERIOUSLY–that is ALL there is to it!!!


OPTIONAL–if you’d like to add something to hang from the center–you can make a bird, a star…whatever your creativity comes up with! I free-hand cut a bird…it’s not perfect–but you know that’s the way I like things…with a little bit of character:)


I LOVE a craft that can involve the children…and I especially love a craft that only cost me $2! If you don’t want to make this–you can buy these on etsy.com for up to $50 dollars. But…it’s every bit worth the time with the kids and the $2 it cost us out of pocket to make! These can be made for ANY occasion!!! Just pick out fabric for Valentine’s, Fall, Spring…and tie away!!!

NOW…anyone in need of a quick tree skirt? Some of you have some left over burlap from our last project. Well, hold on to your stamps and get ready for another project in a couple of days. This one is way too simple…and inexpensive too. Don’t need a tree skirt, well–how about some stockings? Even if they are just for your staircase as decoration? Don’t have burlap? Well, go get you some…because these projects will be too fun and TOO easy not to try at home with your little ones!
Have a great Sunday!
Tutorial for stamp hanging sign is in previous post. You can also find it under “Crafts” in the Christmas section.


by admin
This is ADORABLE:)
I am really digging these crafts!! Any children’s advent ideas coming?? =)
Andrea, I love your amazing craft ideas! I copied your banner and made a thanksgiving one! It turned out great!! Thanks for the inspiration girl!
Okay…too darn cute. I am so waiting for your next project. I need to redo my stockings now that we are a family of 5 this year 🙂
i LOVE this…i think i might try this, this week! :0) love the meaning behind the sparrow!
I love this! you have the best ideas 🙂
I just got out some old fabric and a wire coat hanger this morning, and made one of these after your example… it’s perfect! Thank you so much, Andrea! 🙂
We love the pics and are amazed how Isaac is growing big an dstrong…his smile is a melt your heart smile…even his eyes dance ! All the children are precious.
I am trying to make a smaller version with my pre k students. Practice for fine motors.